RSS Feed
 Twitter
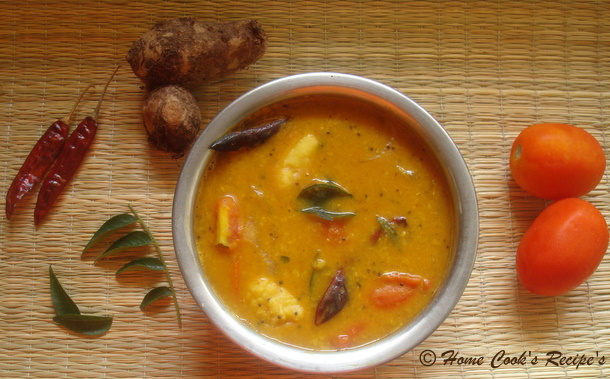
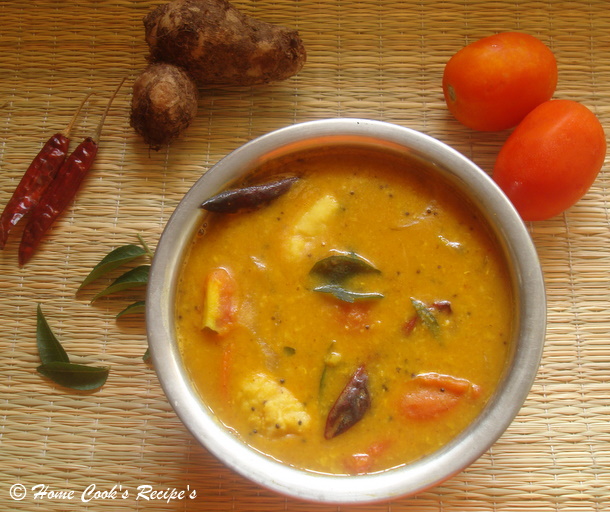
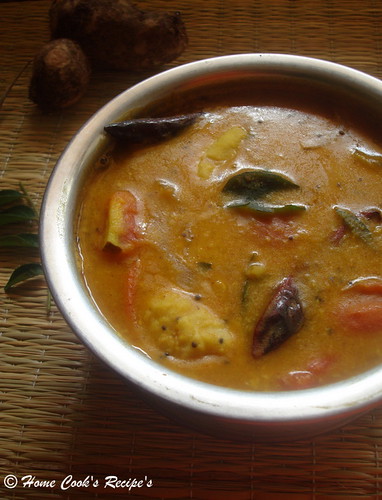
Seppankizhangu Sambhar


This is another favourite dish of mine from my mom's kitchen. Seppankizhangu is a root vegetable, which is called as Taro Root in English. also called as Colocasia. Seppankizhangu Roast is the popular dish, but i dont know, how preparing this sambhar came into practice in my home. If you love Seppankizhangu, then you must try this Sambhar. the soft Seppankizhangu in Sambhar will sure impress you all.
My Hubby don't love this vegetable, so i usually prepare this only if he is not going to come home for Lunch. so one such day was today, and i happily prepared and enjoyed the meal today:) Kovakaai is another veggie that i like, but he hates. and Kothavarankaai is one which i hate and he likes it a lot:)
Is there any similar stories in your family?
Ingredients:
- Seppankizhangu - 6
- Onion - 1
- Tomato - 1
- Cooked Tuvar Dal - 1/2 Cup
- Tamarind - half of a lemon size
- Oil - 1 tbsp
- Mustard - 1/4 tsp
- Asafoetida - 1 tsp
- Dry Green Chilli - 3
- Curry Leaves - 8
- Turmeric Powder - a pinch
- Sambhar Powder - 2 tsp
Method:
Cook the Tuvar Dal with a little asafoetida. If you Pressure Cook, cook it upto for 5 whistles.
Cook the Seppankizhangu with little salt to taste in Pressure Cooker for upto 4 whistels.
After Cooking the Seppankizhangu, wash them with cold water and let it cool and peel its skin. and set aside.
Soak the Tamarind in warm water for about 5 minutes.
In a Pan, heat oil, add mustard and let it pop and add, asafoetida powder, curry leaves and dry green chilli's.
Add Diced onion to the Pan and saute it along.
Add chopped Tomato to the Pan and saute it along onion.
Now add salt to taste, add Turmeric powder, Sambhar powder and mix well.
Add boiled and peeled Seppankizhangu to the pan and mix well.
add tamarind water and 1/2 cup of water and mix well.
let the Sambhar boil in medium flame for about 5 to 7 minutes. and remove from flame.
* Add more water, if like your sambhar little watery.
* Its must to add Asafoetida powder, as it helps to remove gas from the seppankizhangu.
Serve the Sambhar with Hot Rice. some appalam or vadams will make a good combo.